Written by Steve Pham, Senior Software Development Engineer at Amazon and contributor to the O3DE community
This article originally ran on Steve’s O3DE blog. For more content like this, click here.
Developing robots is often difficult, expensive, and time consuming. Developing and running test scenarios in the real world tend to be slow, limited, and cost-prohibitive. Using simulations to build and conduct tests allows robotic developers the freedom to construct virtually any test environment, and the tests are not constrained by the number of robots available for testing. The use of simulation software can help address these issues. Robots can be simulated in a virtual world and tests can be run in a controlled environment repeatedly. However, being able to provide more realistic simulations depends on the capabilities of the software and the hardware. Simulators that provide realistic real-time image rendering and physics often require more expensive hardware. Being able to build and deploy simulations on the cloud means that you can build and run them on demand and only pay by usage, without the need for the initial capital expense. Other advantages like scaling, maintenance, and support come into play as well.
Creating a robot simulation in the cloud
In this tutorial, we will create a robotic simulation that demonstrates a simple Autonomous Mobile Robot (AMR) navigating through a small warehouse using a simulated Lidar sensor. In addition, we will attach an additional RGB Camera to demonstrate how to apply additional ROS components to a model. This demonstration will utilize many different tools and services in order to run on the cloud.
Tools and Services
ROS
ROS is a set of libraries and tools for building robot applications. From drivers to state-of-the-art algorithms, and with powerful developer tools, ROS has what you need for your next robotics project. And it’s all open source. Full project details on ROS.org
O3DE
O3DE is cross platform, open source 3D engine that can be used to create robotic simulations using ROS 2. Originally built as a 3D game engine, O3DE’s Gem) system enables it to extend its usefulness beyond gaming. Its high-quality, photo-realistic graphics capabilities enhance scenarios where image recognition is vital for robotic training. Its physics system, the PhysX Gem, incorporates NVIDIA’s PhysX libraries to provide real-time physics modeling. O3DE is under a dual MIT and Apache 2.0 licensed, which means that there are no restrictions to using the engine. It is a true cross platform engine, meaning that it not a port from one platform to another, making it a perfect fit to integrate with ROS 2 (i.e., direct integration without the needs for any bridging to ROS). It is available as a source-built project (through GitHub) as well as a pre-built installer package.
Amazon EC2 and Nice DCV
Amazon EC2 is an AWS service that allows a user to launch a virtual machine in the cloud. The current requirements for O3DE running robotic simulations call for using Linux Ubuntu 22.04 LTS that uses a Vulkan supported graphics driver and ROS2 Humble packages. Nice DCV is a high-performance remote-display protocol that allows for fast and high-quality streaming over the internet and will be used by the EC2 instance. There is no additional cost for Nice DCV when running on EC2 in AWS. You will still need a license to run Nice DCV, so setting up the IAM permissions on your EC2 instance is still needed.
Step 1: Launch the O3DE EC2 instance from the AMI Marketplace
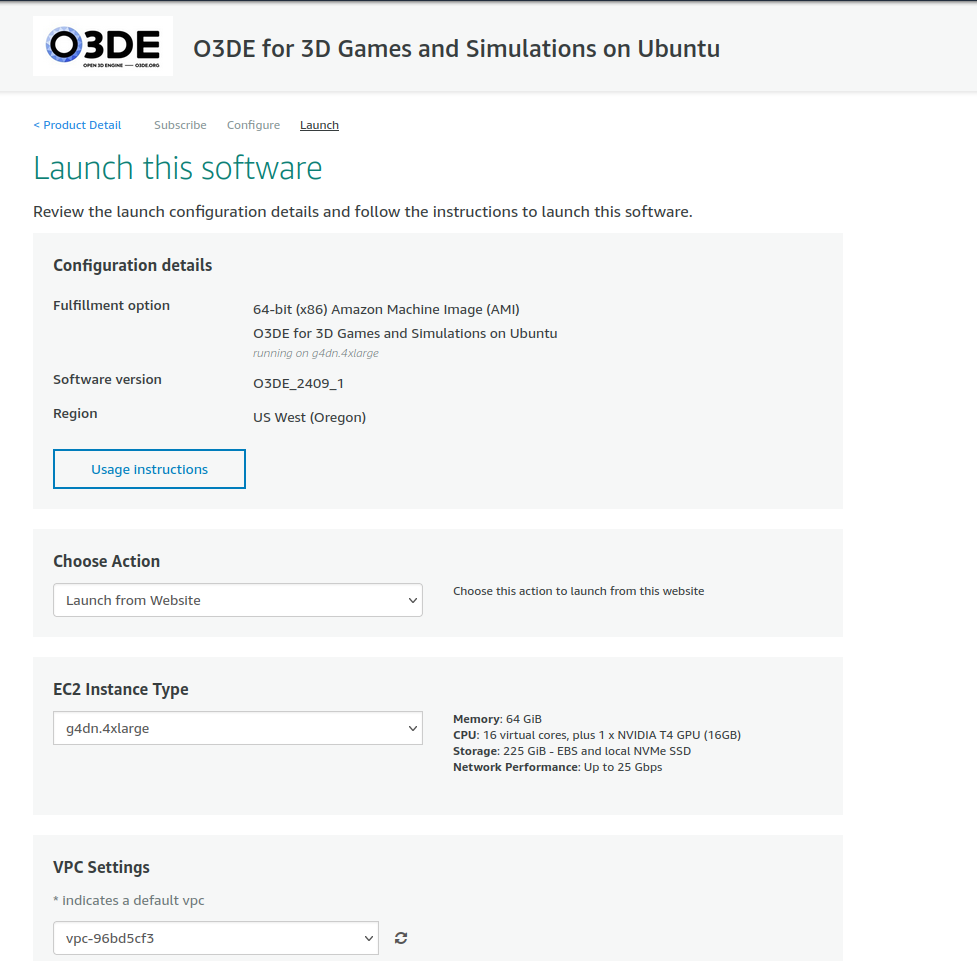
In order to launch the O3DE EC2 instance, you will need to have a valid AWS account. Navigate to https://aws.amazon.com/ and sign into the console with your AWS account credentials. At the top of the page, type in AWS Marketplace in the search box and click on ‘AWS Marketplace’ under ‘Services’. Click on Discover Products and then type in O3DE in the search box in the Search AWS Marketplace products section. Click on O3DE for 3D Games and Simulations on Ubuntu to bring up the AMI page.
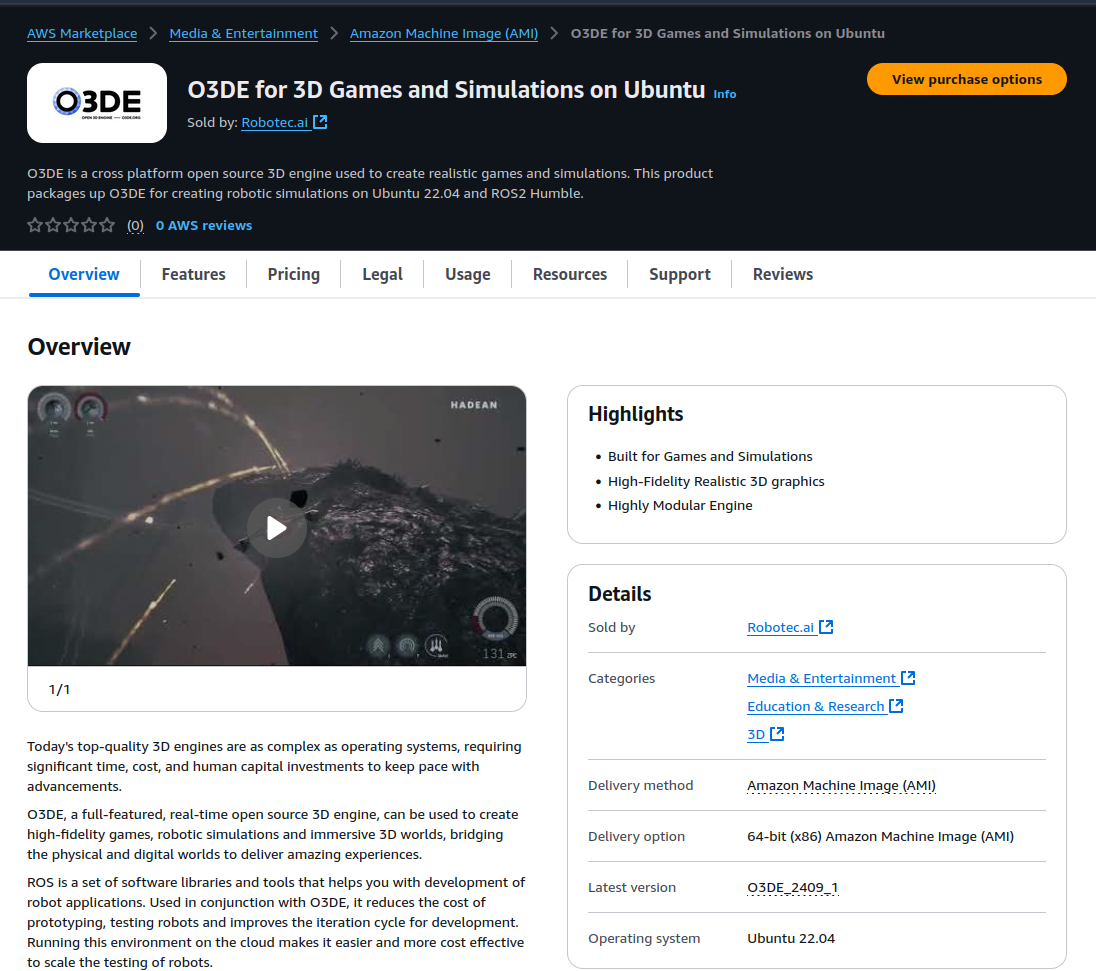
This will describe the version of O3DE that the EC2 instance will be configured with. Click on View purchase options and Accept Terms to the EULA to continue. Once you are subscribed to the product, continue on to the configuration page.
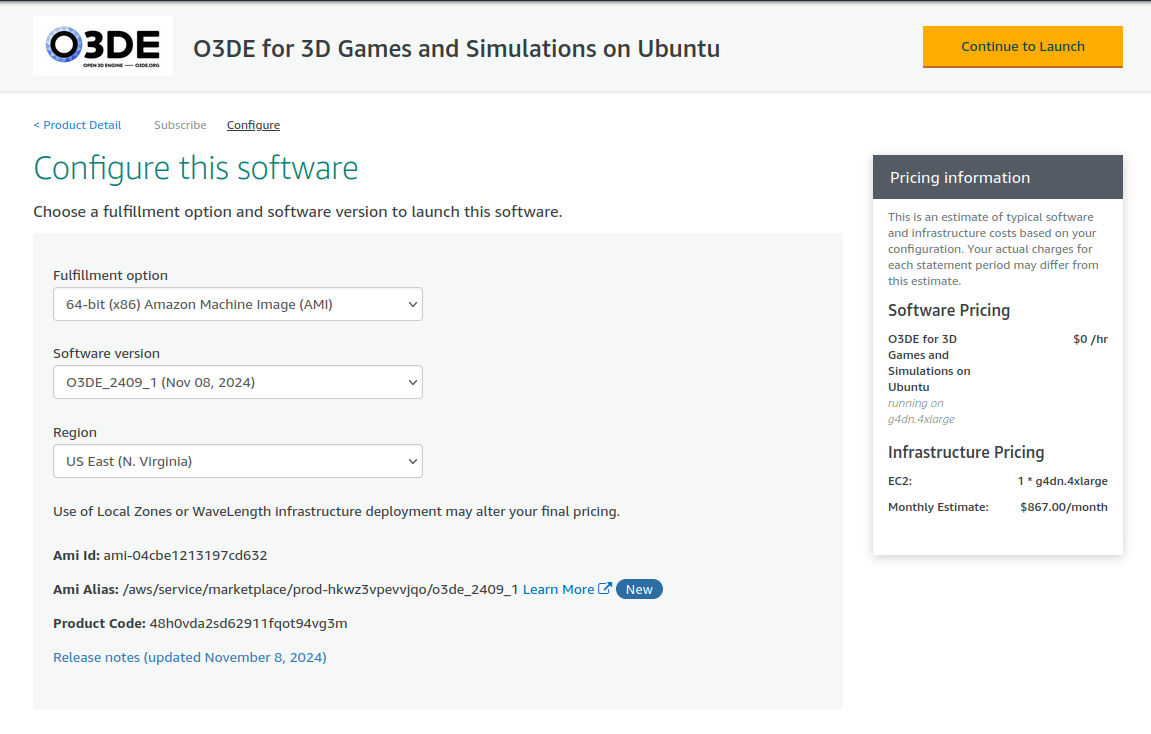
Make sure to specify the region that is closest to your location geographically for the least amount of latency. Click on Continue to Launch to launch the new EC2 instance. Note that the instance type defaults to g4dn.4xlarge, which is the recommended instance type for the image. The instance type can be changed on the following Launch page. There is no software or subscription price related to this AMI. The infrastructure monthly estimated cost is based on having the instance run continuously for a month, but in most cases, including the cases in this tutorial, we will only run the instance when needed.
The Launch this software page will allow you to set the necessary parameters to launch an EC2 instance. Adjust the settings as needed, or optionally use the default behavior. Keep in mind that the usage instructions need to be followed in order to connect to the new instance, which may involve adjustment to the Security Group Settings. Click on Launch to start the EC2 instance launch process.
Note: There may not be availability zones that support the instance type you are trying to launch. You may need to search for another subnet or availability zone.
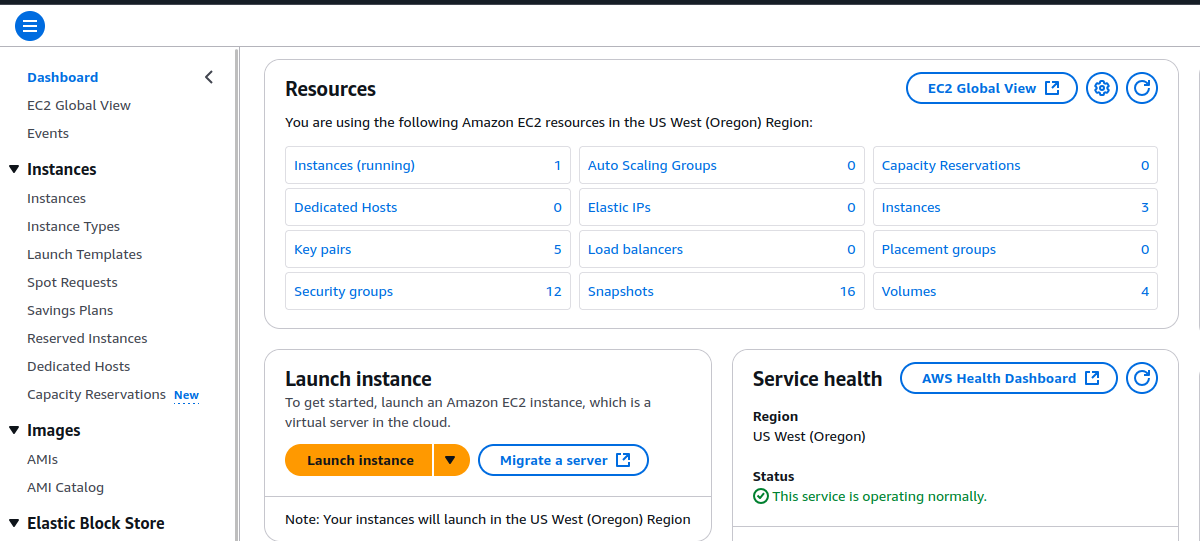
Go back to your AWS account dashboard, and type in EC2 in the search bar above and click on ‘EC2’ to navigate to the EC2 dashboard. You will see an Instances (running) link under the Resources section.
Click on the link and select the new EC2 instance from the AMI to show to the detail path. You can optionally name the instance by hovering over the blank name field of clicking on the pencil icon.
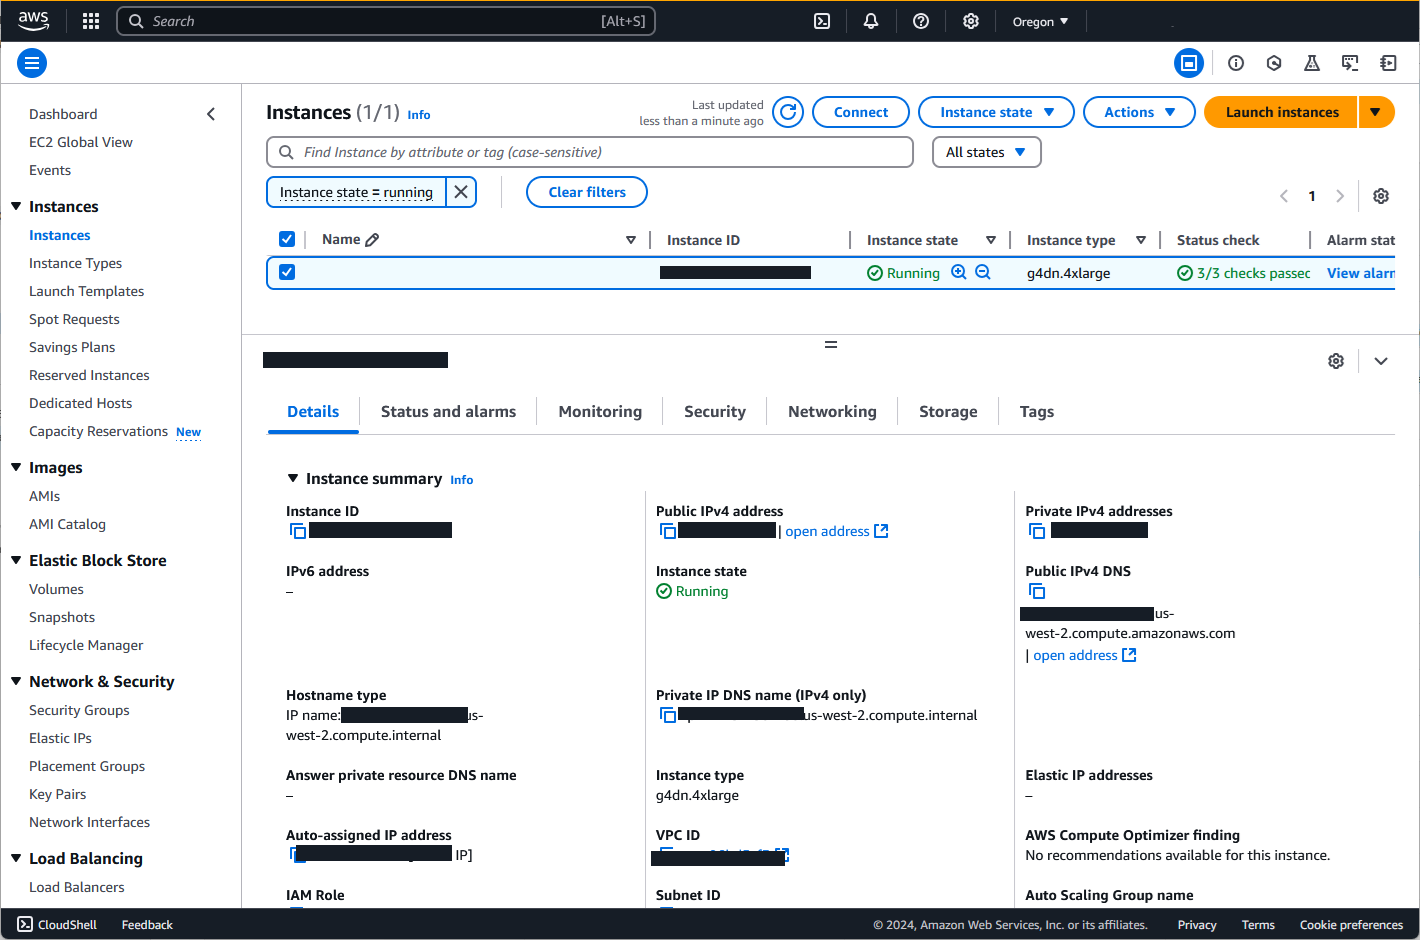
You now have access to the EC2 instance with O3DE using the Public IPv4 DNS. Before signing in, you need to configure the security group for this instance to allow for TCP traffic from port 8443 coming from your current desktop. After doing so, you can sign into the built-in DCV client through the web browser by connecting to the public IPv4 DNS and port 8443 using https://<the Public IPv4 DNS for the instance>:8443, or you can install the Nice DCV client for your current computer.
Step 2: Log into the EC2 instance
Using either the web browser or native DCV client, connect to the EC2 instance and provide the username and password. The EC2 instance uses a default username o3de and the password is initially set to Instance ID for this EC2 that was created from the AMI. After logging in through DCV, you will again need to log into Ubuntu with the same username and password. At this point, it is recommended that you change the password from the one generated from the instance ID to one that you are comfortable with (using the `passwd` command line tool).
Step 3: Launch O3DE
Click on the Show Applications button on the bottom left of the window, and locate and click on the O3DE icon:
This will bring up the O3DE Project Manager.
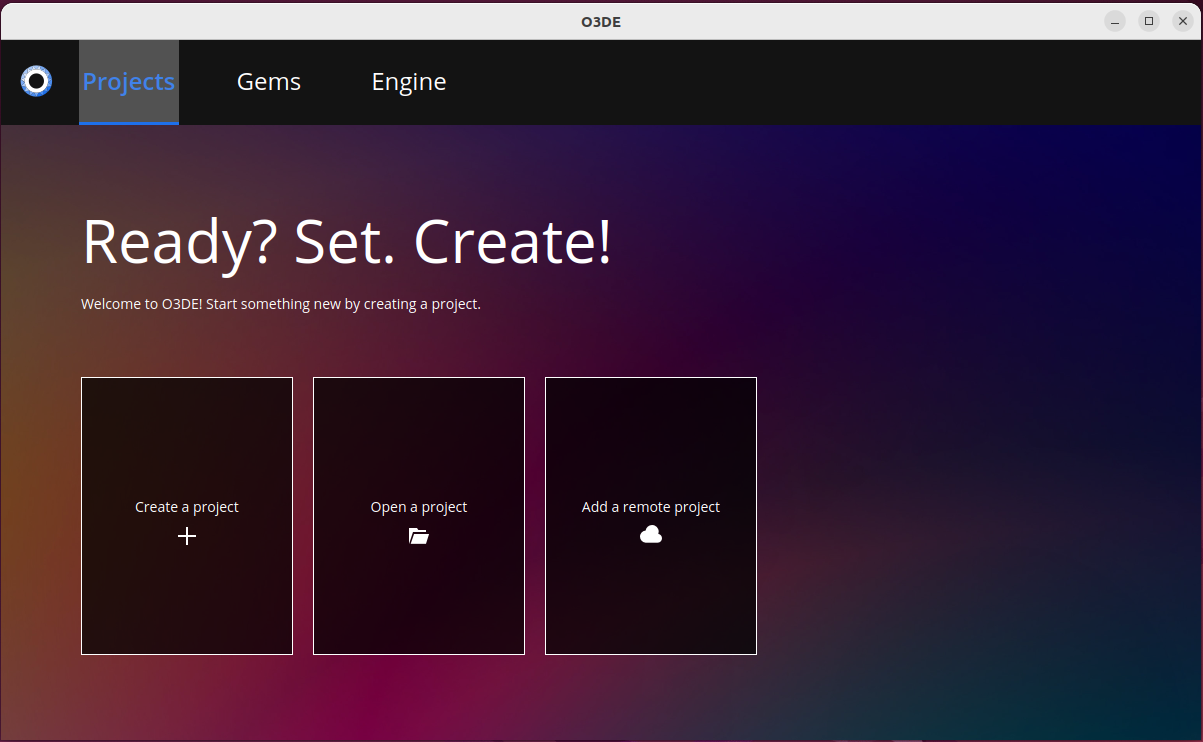
Step 4: Create a new ROS2 Project
Click on the ‘Create a project’ tile and enter in the project details
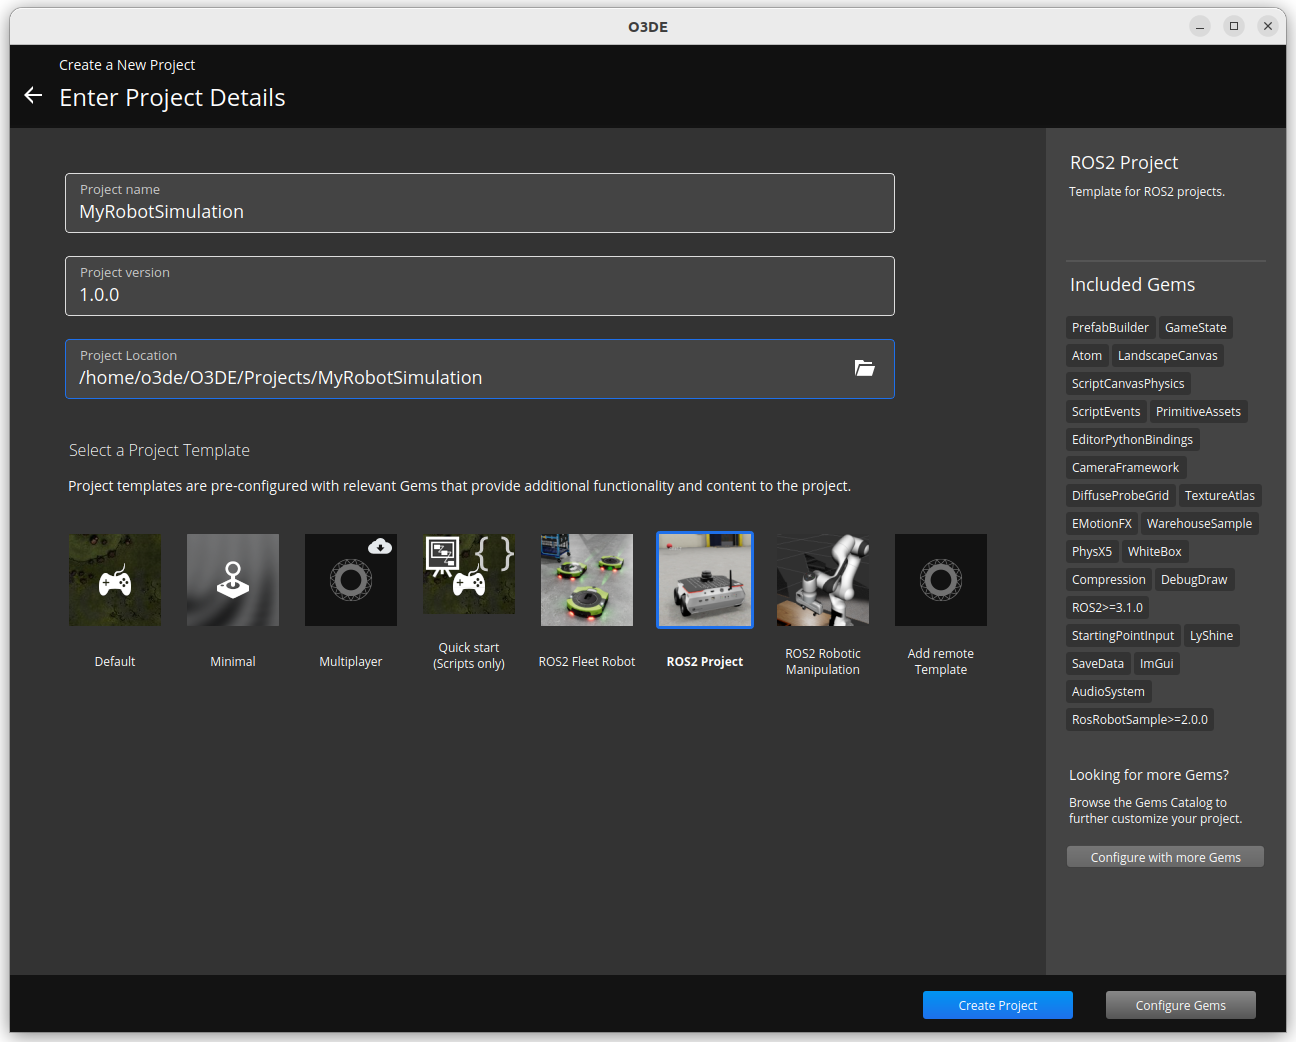
For the Project Name, type in ‘MyRobotSimulation’ and select ‘ROS2 Project’ from the list of templates and click on ‘Create Project’ A message stating ‘MyRobotSimulation’ project likely needs to be rebuilt’ will display. Click on OK to go back to the Project Manager home screen.
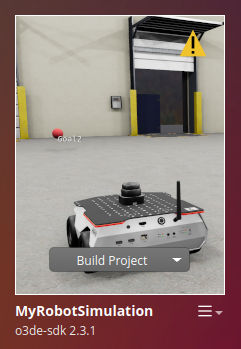
Note: There is an error in version 1.0.1 of the ROS2 Template where the default level has an invalid component name. As a work-around, after the project is created based on the project details specified above, update the generated level by running the following command from the terminal:
sed's/R2PT/MyRobotSimulation/g'-i ~/O3DE/Projects/MyRobotSimulation/Levels/DemoLevel/DemoLevel.prefab
Click on ‘Build Project’→‘Build Now’. This will start the build process. Note that the first project built on a new image will take longer than normal since there is a bootstrap process that needs to be performed which involves downloading and initializing 3rd party libraries and binaries. On a g4dn.4xlarge instance, the estimate initial build time is may take anywhere between 8-15 minutes.
When the build process is completed, you will see an ‘Open Editor’ button now available in the project tile for ‘MyRobotSimulation’ when you hover over it.
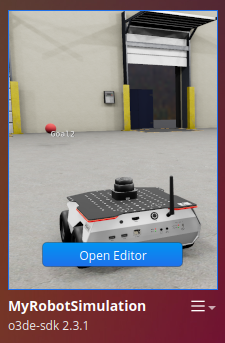
Click on the ‘Open Editor’ button and wait for the Editor to fully launch.
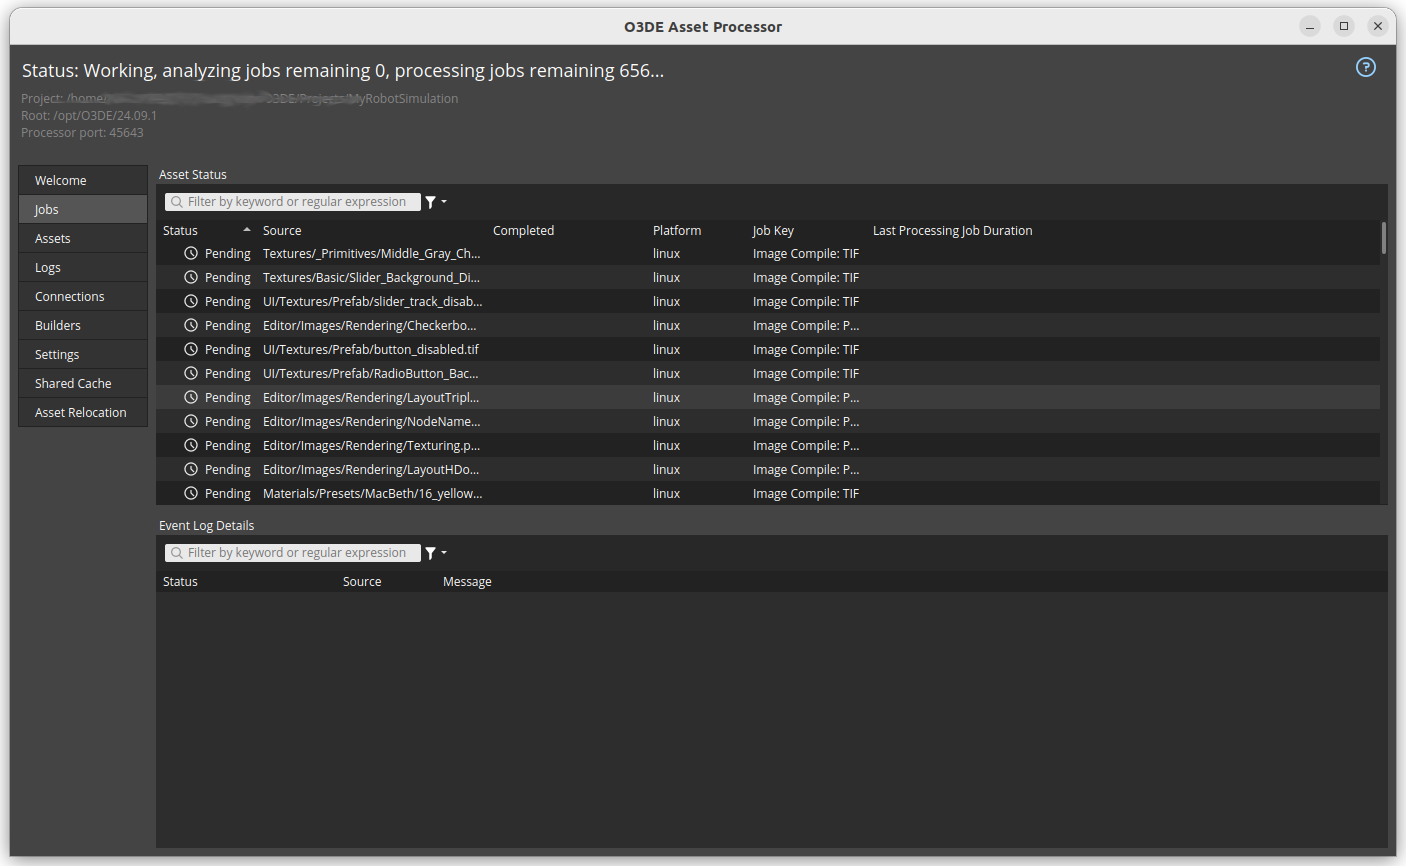
Note: On a new EC2 instance, the first time loading O3DE may look as if nothing is happening. The first run through is very long due to the number of dynamic modules being loaded for the project (it may take around 5 minutes before the splash screen appears). Once the dynamic modules are loaded, O3DE will start a tool called Asset Processor which processes all the assets for the project; asset processing for the first time and may take up to 10 minutes. O3DE will not open until all the critical assets are processed, but it is recommended that you wait until all assets (even non-critical assets) are compiled. The total time to launch O3DE and process assets is approximately 11 minutes on a g4dn.4xlarge instance.
You can view the progress on Asset Processor by opening the tool by clicking on the ![]() icon on the top right
icon on the top right
Step 5: Open and edit the DemoLevel
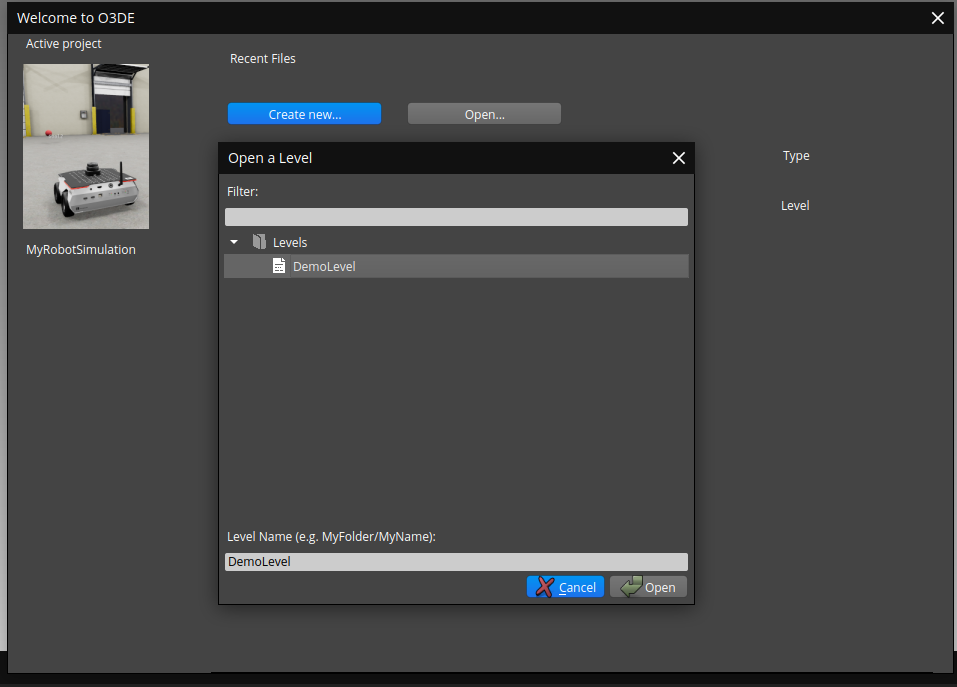
The project template creates a default level called DemoLevel that contains a ROSBot in a simple warehouse scenario. In the welcome screen, click on Open and select ‘DemoLevel’ in the Levels folder and click Open.
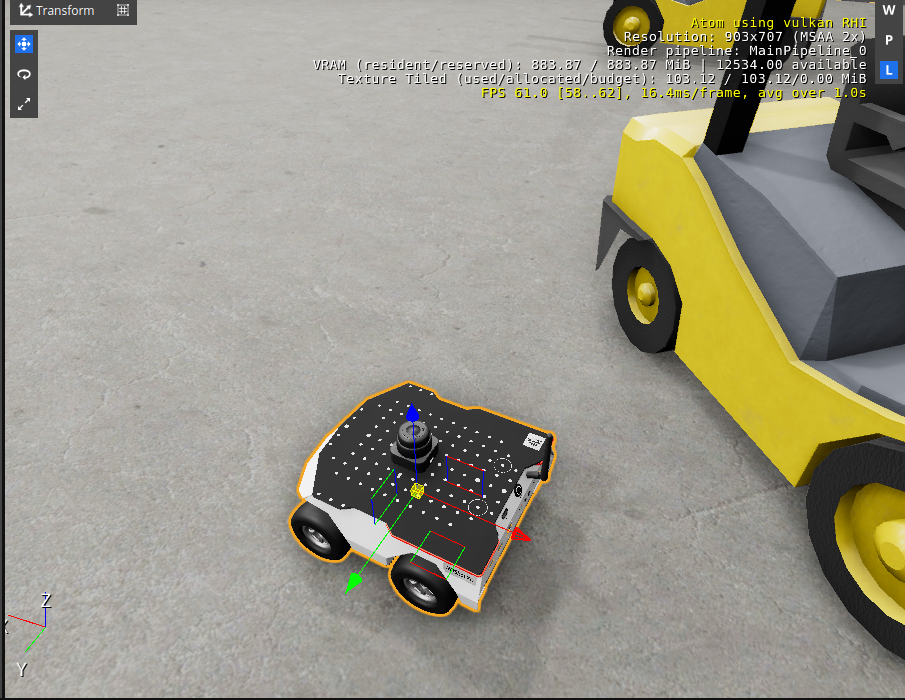
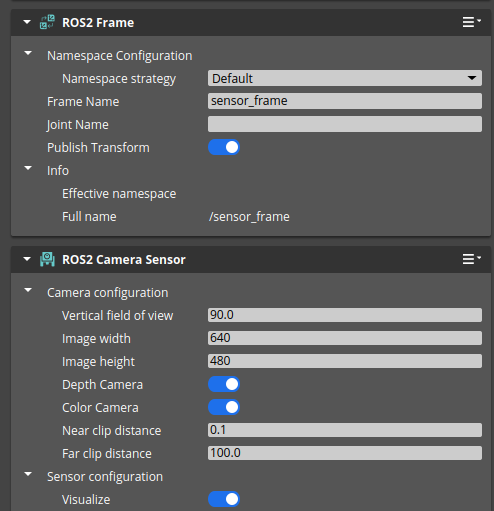
The ROSBot is configured to use a ROS2 Lidar sensor by default. To demonstrate how ROS2 components are added to the robot, we will modify this sample project to also include an RGB camera sensor so that the robot will provide a color camera feed during the simulation. In the main editor viewport, locate the ROS2XL bot and make it the selected entity by clicking on it.

In the Entity Outliner panel on the left, open the rosbot_xl_slamtec prefab, and drill down to rosbot_xl→body_link.
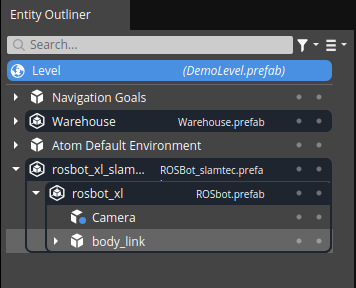
Right click on body_link and select Create Entity. By default, a new entity named ‘Entity1’ will be created. Select the child ‘Entity1’ in the Entity Outliner so that it will be in focus in the Inspector panel on the right. Make the following changes to the name and translate/rotate values:
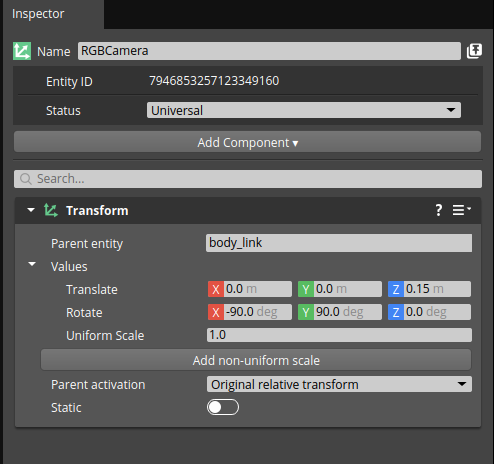
Transform Details
| Name | RGBCamera |
| Parent entity | body_link |
| Translate | X=0.0, Y=0.0, Z=0.25 |
| Rotate | X=-90.0, Y=90.0, Z=0.0 |
Add a ROS2 Frame and ROS2 Camera Sensor to this new entity using the ‘Add Component’ button.
Step 6: Setup and launch RViz
RViz is a graphical interface for ROS that allows you to visualize and control robotic simulations. The project we created from the ROS2 template comes with a sample RViz configuration that will visualize robot in the warehouse setting and allow you to navigate the robot using goal poses. We will use RViz in conjunction with O3DE to run and control the sample robotic simulation. To use RViz for this example, you will need to make sure additional ROS2 packages are installed. Run the following from a terminal inside the EC2 instance:
sudo apt install ros-${ROS_DISTRO}-slam-toolbox ros-${ROS_DISTRO}-navigation2 ros-${ROS_DISTRO}-nav2-bringup ros-${ROS_DISTRO}-pointcloud-to-laserscan
Before launching RViz, start the O3DE simulation by going to the Editor and clicking the menu bar Game → Play Game → Play Game (Or pressing CTRL+G on the keyboard). This will leave edit mode and start the simulation in the Editor. Next, launch RViz by running the following commands in the terminal.
cd ~/O3DE/Projects/MyRobotSimulation/Examples

ros2 launch slam_navigation/launch/navigation.launch.py
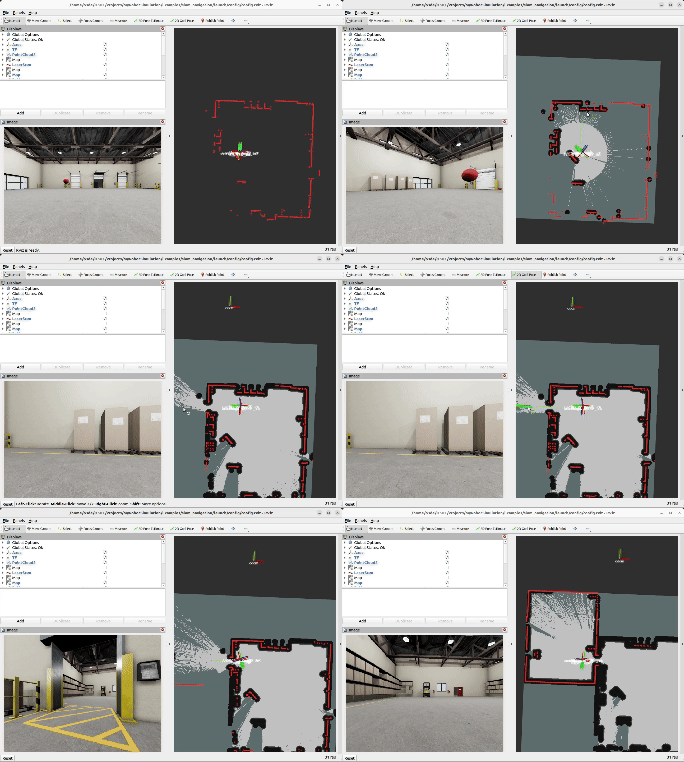
This will bring up the default RViz window based on the sample. Click on ‘Panels’ and check on ‘Displays’. You will see the following window.
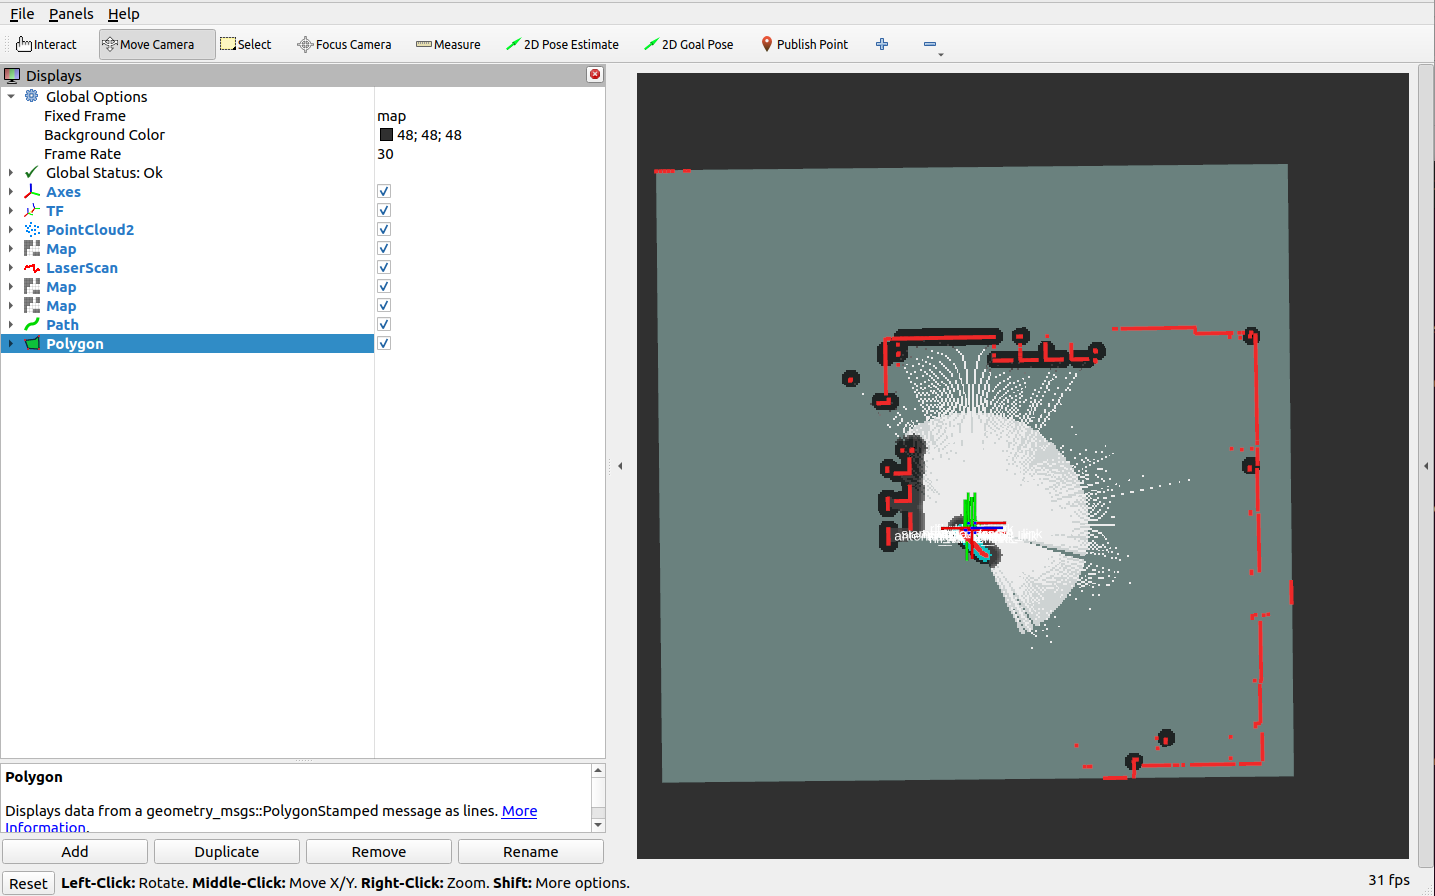
The default configuration only uses LIDAR sensor that was part of the original ROSBot. Since we added a ROS2 Camera sensor, we will add an image feed that will read from the camera topic. Click on ‘Add’ at the bottom of the left panel, and select the ‘By topic’ tab.
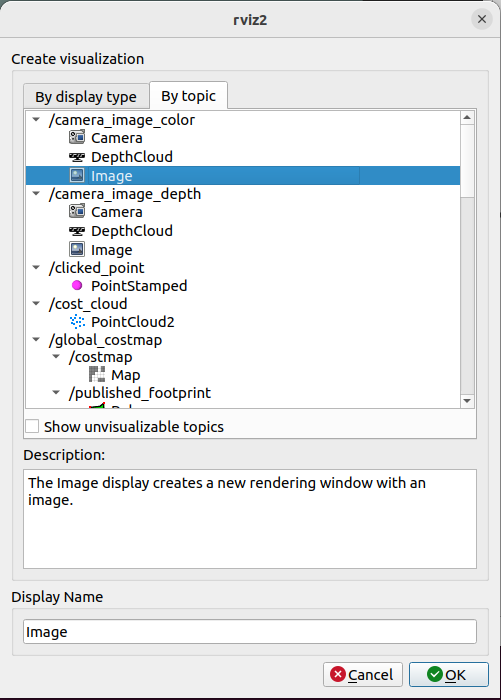
Select ‘Image’ under the ‘/camera_image_color’ topic and click ‘OK’ to create the new Image item in the Displays tab. Initially, the image will show ‘No Image’. To fix this, in the Displays tab, drill down to Image → Topic → Reliability Policy and change it from ‘Reliable’ to ‘Best Effort’.
Adjust the size of each panel in the window as needed. At this point you can save the configuration for future use. Make sure to save the configuration at this point.
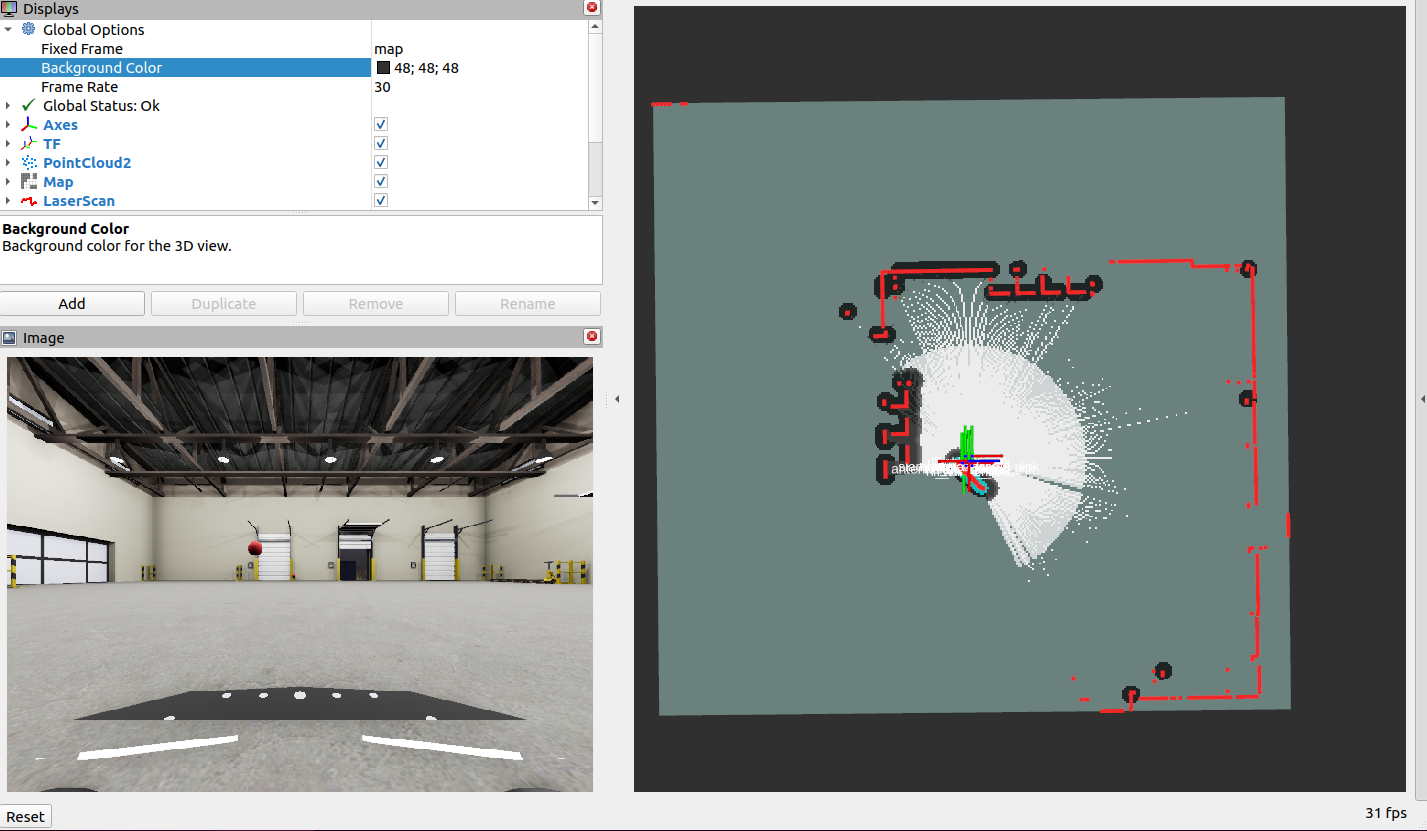
You should now be able to set navigation goals using the 2D Goal Pose button and pointing to where you want to robot to attempt to navigate to.
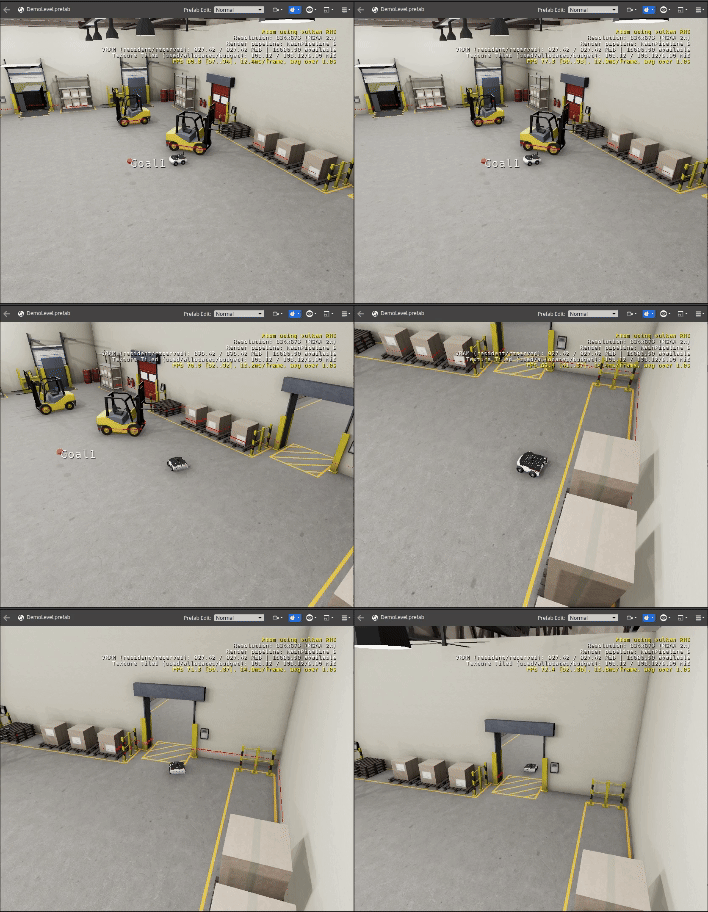
You will also see an external camera view of the simulation in the Editor.
Step 7: (Optional) Preparing to use the simulation launcher
Alternatively, you can launch the simulation using the Game Launcher without the need to going through the Editor. To do this, open a terminal and enter the following command:
~/O3DE/Projects/MyRobotSimulation/build/linux/bin/profile/MyRobotSimulation.GameLauncher
Tear down
Once we are done with the simulation, we can stop the instance until we need to start and run the simulation again. Stopping the instance will prevent you from incurring any EC2 costs based on the instance type that was selected. You can also terminate the instance completely to stop any EBS storage costs ($0.10/GB per month). It is recommended to track your changes with source control if you plan to reuse or continue updating this sample ROS2 project.
Conclusion
In this post we demonstrated how using Amazon EC2 and a custom Amazon Machine Image makes it easy to quickly start a robotic simulation with O3DE and ROS2. Using this setup not only eliminates the need for the upfront capital expense of securing physical Linux hardware, it also ensures that the software environment is properly set up and ready to go. The example in this blog demonstrates how to quickly create a simulation for a simple AMR with basic Lidar and camera sensors, using ROS2 supplied navigation components. There are other templates provided by O3DE to try out other scenarios like robotic arm manipulations and robotic fleets. For more information on O3DE robotics and simulations, refer to this page.
